Thursday, May 8, 2014

Copy file path on maverick with Automator

I recently register to COPY cloud service and collaborate some folders with my colleagues. So that everyone has a sync copy in their local hard drive. After I have update a file in it, I don't have to email the physical file but to inform him/her the file that I need them to look at.

How to tell them which file that I need them to look for? The file sometimes stores inside a very deep folder, so without them wasting time searching for the file, I have to get the file path and send it to them. But to get full path of that file, I can press command-i to get info that file and copy the path from there. Which involve a few mouse click and text copy paste which is a bit inconvenient. I am very lazy person, so I want shortcut to accomplish my task. 

Here is a easier way to get the path of a file. MacOS Maverick does not have this feature, so we make one for our need. 

End result is to right click the file and get its path.


Here is how we are gonna do it.
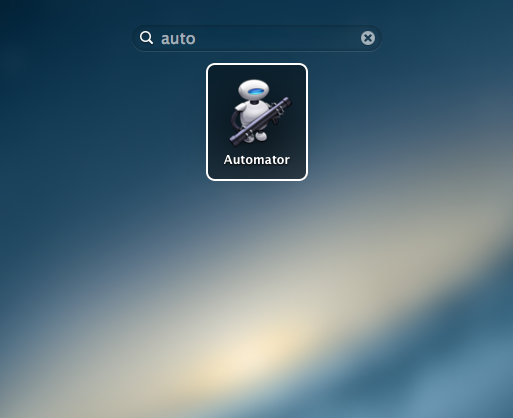
Step 1
Launch Automator

Step 2
In choose a type for your document window, select SERVICE then click Choose button.


Step 3
Drag Copy to Clipboard from second column from left, to the right side workflow space.
In the Service receives selected drop down menu, select files or folder;
Then in drop down menu, select finder.app.


Step 4
Save it and put a service name

Thats it, you are done. Its so simple even I myself did not believe. Now just go to finder and right click any file to try out. 

Maybe you are curious where is the file we just created stores in. 
This workflow file is stored in your home folder/Library/Services/Copy filepath.workflow. If want to delete the service, just drag the file into trash. (I haven't try it, I presume it work that way)


Monday, May 5, 2014

Method to remove / delete printer driver from Mavericks

Ok this is a problem with Mac OS. Its easy to remove or uninstall apps by dragging apps into the trash. But when it comes to printer drivers, its still use the same method. 

We normally download printer drivers off from the printer manufacturing websites. And the printer drivers often comes with a package that requires to install into the Mac. But it mostly do not bundle with an uninstaller.

What Apple support shows here http://support.apple.com/kb/PH13875 was to remove the printer from system, but the printer driver is still remain in the system.


Here is the a problem when the printer driver is not compatible, or corrupt... without uninstallers like windows, how do we get rid of the spoiled driver from you Mac?

I personally don't like utility softwares. I don't know... I just don't feels like using it. So I did some research and below is the method on how to get rid of it.

Step 1
Remove the printer from your system by going into system preference > printers and scanners.

Step 2
Select the printer you want to remove, then click "-" button below the list of printers.

Step 3
Close the system preference window.

Step 4
Open up your hard drive that contains your boot system. Normally it names "Macintosh HD".

Step 5
Go to Library > Printers > PPDs > Contents > Resources. A list of the printer drivers on your Mac appears.

Step 6
Click and drag the name of your printer model's driver into the trash.

Step 7

Press and hold the "Control" button on your keyboard while clicking the trash can icon in the dock, or without holding "Control" key and right click you mouse to select "Empty Trash."

Step 8
A password prompt pops out and you will need to key in your Mac login password to remove them to the trash.