Monday, April 6, 2020

OneDrive download limit grey out

How to remove OneDrive download limit grey out


Its very frustrating my organization IT who set a group policy to limit download sync and cause the cloud service unusable. However, after studied that on my local machine has download group policy from my organization domain, I find that is possible to hack and overwrite it so long it meets my goal.


If you have admin rights to your PC, you can change it easily via registry editor. 

Navigate to Computer\HKEY_CURRENT_USER\SOFTWARE\Policies\Microsoft\OneDrive\DownloadBandwidthLimit and change the value.


Without admin rights


IF you do not have admin rights, then you have to RUN registry editor as ADMINISTRATOR. Normally group IT will setup PC by using .\admin or .\administrator without password.

Take note that the registry path render differently if it run under administrator rights. 

Then in the editor, Find (Ctrl + F) DownloadBandwidthLimit until it reach to a path of OneDrive. My case here is a path that inside a user. Its not very hard to recognize the strings of path its self explanatory. 


After changing the value, restart OneDrive app. Here we successfully change download rate.


Friday, February 14, 2020

Kinetix 5700 bundle

For documentation only... the Kinetix 5700 box includes:

1: The drive
2: 2198-KITCON-D032-L (Connectors)
3: 2198-BARCON-5DC200 (Bus bar)


 2198-KITCON-D032-L (Connectors)


2198-BARCON-5DC200 (Bus bar)


Wednesday, July 3, 2019

1784-U2DHP - USB to Data Highway Plus Cable


Image result for u2dhpUse this cable to upload and download RSlogix 500 ladder project into below Allen Bradley controllers.
Controller models
PLC-5/11 Processor
PLC-5/20 Processor
PLC-5/30, -5/40, -5/60, -5/80 Processor
PLC-5/40L, -5/60L Processor
PLC-5/20E Processor
PLC-5/40E, -5/80E Processor
PLC-5/20C15 Processor
PLC-5/40C15, -5/80C15 Processor
SLC-5/04

Communication on the DH+ link requires the RSLinx Classic software DF1 serial 1770-KF2/1785-KE drive.

RSLinx Classic Software, Version 2.53 and Later 


Do these steps to configure the cable device driver by using RSLinx Classic software, version 2.53 and later. 
1. Open RSLinx Classic software and then, from the Communication menu, choose Configure Drivers.
2. From the Available Driver Types pull-down menu, choose 1784-U2DHP for DH+ devices.


3. Click Add New.
4. Enter a name for the driver you just added and then click OK.

The Configure 1784-U2DHP dialog box appears.


5. Enter configuration information in each field.

Comm Port is being assign by Windows once you plug it in. Go to Windows Device Manager, open up Ports and you will see its Comm # there.


*** IMPORTANT Do not disconnect the cable without first using RSLinx Classic software to stop the driver. Disconnecting the cable without stopping the driver can shut down or cause RSLinx Classic software to become unresponsive.


The info taken from user manual
https://literature.rockwellautomation.com/idc/groups/literature/documents/in/1784-in045_-en-p.pdf

More info on SLC500 compatible cables: https://www.dmcinfo.com/latest-thinking/blog/id/9493/how-to-connect-to-an-allen-bradley-slc-500-plc

Sunday, December 30, 2018

Bypass WhatsApp Video File Limit

As if you landed here means you are experiencing Whatsapp force you to trim the video you were trying to attached in your chat due to your video file size has exceed 16mb limit.


Just wonder why we could receiving videos which is larger than 16mb from friends or Whatsapp chat group but could not send. There are various tweak available if you google, such as root your android phone to bypass whatsapp from checking the video file size, compress video files or edit the video. But these method is too troublesome.

The good news is there is another not too troublesome method. Use Whatsapp desktop app or web-app to send the video.

Below is the method I normally use...

1. Use SendAnywhere mobile app to send the video file to your PC/Mac.
2. Go to send anywhere website from PC/Mac and download the file being send from your phone.
2. Then attach the video to the chat/group with Whatsapp PC/Mac desktop app or web Whatsapp.

With this method, Whatsapp limit is 64mb. If your video is larger than 64mb... well, I currently do not have a simple solution.

Link to SendAnywhere App
How to use SendAnywhere video tutorial

Friday, July 6, 2018

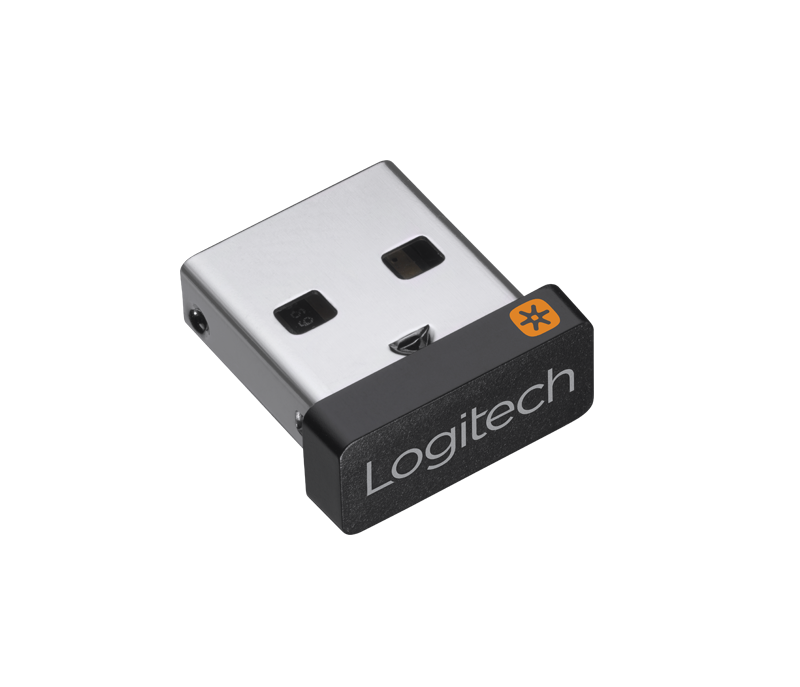
Logitech wireless mouse/keyboard USB receiver software

Logitech produce quite a lot of stuff, but their popular devices are still wireless keyboard and mouse. There is a particular product very useful is their unifying USB receiver. It is sold separately and what it does is, it could pair up to 6 devices. Really... do I need to pair that many mouse and keyboard with my PC?
An real application example is, when you have a set of keyboard and mouse at home, and another set in office, and another set at your mistress home so you can pair them up into this single USB unifying receiver. It actually benefits notebooks more than a desktop.

Another application is when you have lost or a faulty USB receiver that comes with your keyboard/mouse, instead of throwing away the keyboard or mouse away you can buy this unifying receiver to replace the faulty receiver.

Check if you have a unifying compatibles devices 


You need to have a device with the unifying logo printed on its label to be able to use the USB unifying receiver. Check it before buying!

Softwares to configure you mouse/keyboard.

** Reminder, if you pair your device to this new USB unifying receiver, the original receivers will no longer works. But don't worry, there is a way to restore it back to the original USB receiver.

To configure you USB unifying receiver, you need this software to do it...

For Windows machine
For Mac OS...

Or if you prefers to download from official download site Here.


Software to restore your wireless mouse/keyboard back to original USB receiver.

Why we need this software? As I mention earlier, after your mouse/keyboard has been pair to Unifying USB receiver, it will no longer work with its USB receiver that comes with it. Luckily Logitech has include another software to restore its original USB receivers.

Only windows available... download here. ConnectUtility_2.xx_Logitech.exe.

Or if you prefers to download from official download site Here.

Tuesday, February 27, 2018

Allen Bradley XM series


This XM120 module already obsolete and should be replace by XM-124. Below is the steps to get this part replace.


If using this module, it should be dock with XM-940 Dynamic Measurement Module Terminal Base - A DIN rail mounted base unit that provides terminations for all field wiring required by XM Dynamic Measurement and Eccentricity modules.

User guide: http://literature.rockwellautomation.com/idc/groups/literature/documents/um/gmsi10-um010_-en-p.pdf

Sunday, February 11, 2018

MacOS Sierra Hidden Login Item Or Autorun during startup

Other than manually add auto startup app in user & group preference, there is another path some apps or adware like your mac to run it after startup. Do remove it and it should be good.

/Users/userfolder/Library/LaunchAgents

You can get into this folder in finder > go pull menu, then hold option key on your keyboard and Library should be display.

Navigate into the path above, then a list of Plist file should be shown. Open the suspicious plist file and you should be able to spot something unusual app. After open the file with a text editor, find the path of the actual app.

Always google the app and check for more info. After identify its useless then we can proceed with removal.

1. Launch activity monitor app and end the app task.
2. Move the app to trash based on the path. 
3. Move the Plist file to trash.
4. Empty trash.

There it should be removed.

Saturday, March 28, 2015

Setting up Inverter motor

One thing good to buy stuff from China is cheap. Problems with China product is their support and documentation. I came across an Inverter which is cheap... I think, manual in full Chinese characters. And it only describe the settings, but not explaining how to use it or apply it.

However, I have figure out some of the basic settings that need to get it running. Below is the list you need to set at first before run the motor for the first time.

Lets start run the motor with pressing the button on the panel. By default, the inverter will turn the motor when you press "START/RUN" button on the panel. If the motor doesn't moves, then by turing the knob on the panel to increase the power... hence motor will move.

Button on the panel is fully manual operation. If you need to use the PLC to control it run and stop, you will need to wire the input bits on the inverter.

By default, most of the inverter setting
DI1 = FWD
DI2 = REV
DI3 = Multisettings bit 1
DI4 = Multisettings bit 2

These DIn function can be configure to take other function. Check the manual, it should have lists of option to choose from.

2ndly, we are interested in Accel and Deceleration. Inverter use "seconds" from 0 to desire speed.
Check your manual, it should have an option to set the Accel and Deceleration.

3rdly, How we want the inverter to accept run/stop command. There are a few options: Panel button; IOs; or Communication port (normally RS485).

4th, How you want the motor to stops. It has 2 options: Free the motor, or reduce to stop by inverter.


Once the settings are set, motor will run the same behavior when turn on DI1 or DI2.

If you need different speed settings, then you have to utilize DI3 and DI4.

Check the manual for multisettings combination bit settings. Example here is DI3 and DI4. Because the inverter i am using only has 4 DI. First 1 and 2 has been used for direction, so left only 2 bits DI. With this 2 bits DI, you can configure 4 different settings with the combination binary method.

Above few settings should be sufficient for normal forward reverse operations. In fact, it has more capable than this. I leave you some room to explore it yourself, or you could share your adventure with me in my comment box.


Monday, February 23, 2015

Rebuild Launchpad in Yosemite

I look up and down for how to rebuild Yosemite launchpad database. And finally found the way and successfully rebuild it.

To cut long story short, just follow the steps below it will just rebuild it. Until someone comes out with a program to simplify the process, we have to use terminal to do it.


Step 1

Open Terminal (from application or spotlight search)

Step 2

Type the below or copy paste line by line in terminal

rm ~/Library/Application\ Support/Dock/*.db
rm "/$TMPDIR../0/com.apple.dock.launchpad/db/db*"
defaults write com.apple.dock ResetLaunchPad -bool true; killall Dock


Check launchpad and the apps in application folder should appear in the launchpad.


Thursday, February 19, 2015

Mavericks calculator app


For those who finds Yosemite calculator app uncomfortable, you can actually runs calculator app from Mavericks version on Yosemite. 

You can the download MacOS Mavericks version of calculator from here. 


Tuesday, November 25, 2014

SOLAR PV FEED-IN installation

This installation process may not be the same from vendor to vendor. This is so happen I've made an investment on this, and would want to record down the process during installation. It serve a record as well for others as a reference.


Malaysian government has introduce Sustainable Energy Developments a few year ago. And one of the program it is give out quota to home owners to install solar panel on their roof to harvest sunlight and convert into electric energy and supply back to the Grid, the sole electric company Malaysia (TNB) will pay or buy 100%* of the electric power generated by the home owner. Actually not 100% unlimited, it will based on a ceiling rate SEDA has decided.

The government has setup a department call SEDA Malayisa (Sustainable Energy Development Authority of Malaysia). Their role is to administer and manage the implementation of the feed-in tariff mechanism mandated under the Renewable Energy Act 2011 [Act 725]. www.seda.gov.my.

I am here to explain Solar PV (individual only). There are a few more category which is more on like factory style where need a lot of money to invest.

How I get into this? Well, there were one time I receive a call from a telemarketer and invited me to go for a seminar pertaining investing solar farming. So, I went there without much expectations and see what they have to offer. Appear to me was a company, name Green Solar International. They are one in hundreds of the approved PV representative by SEDA. Their role is to sell a total package inclusive of apply for PV quota, plan and design suitable hardwares to be use, supply hardware and labour installations, maintenance etc pao-kaliao* kind of service. I only need to supply some documents and money to them and they will do all the dirty work including to get the quota from SEDA. Fees and charges for the whole project, for my case I opt for 4kW is RM46k.

Payment of RM46k is payable to Green Solar International in 3 stages. Which is 30%-40%-30%. After a day of consideration, I finally decided to invest into this.

Here is how it work, depends on their statistic. SEDA will allocate a number of MegaWatt quota for Solar PV maybe 2 or 3 times per year. There are no fixed date or fixed quota each time they release. 

These are the parts they deliver, the main parts for my setup are 16pcs of solar panels, inverter, switch box, cables, solar panels roof brackets and railings, wires etc. 

Each panel generate 30vdc, so it wired in series 8 pcs of panel to generate 240vdc. 2 sets of 240v goes into inverter and capable to produce max 4kw at any one time in theory. This is based on the SEDA feed-in approval, but in actual really do not know how much it can produce.

There is an agreement signed with TNB call Renewable Engergy Power Purchase Agreement (REPPA) for 21 years based on SEDA Feed-In approval. Meaning that with this agreement, TNB will pay 110% based on SEDA declared annual availability (MWh) table. There is a table SEDA had declare for us in MWh per year. The Availability rate declined every year until year 21. So if your solar panel system do produced more than SEDA declared, TNB only pays maximum 110% of what has declared in the table. On the other hand, we as solar electric producer also has to meet annual minimum performance threshold of no less than 35% of the declared annual availability. If it does not meet, then we have to call GreenSolar to rectify the problem.

Lets summarized the information, there are still alot more but it has become boring topic.

Investment: RM46k pay to greensolar international. Their service include apply for SEDA Feed-in approval, evaluate premise roof top, installation, service, commencing, arrange for TNB REPPA agreement, TNB meter installations etc. From head to tail.

ROI: for 4kw, as of 2014 rate is RM1.2337 per kwh produce for 21 years. This rate will be different depends on each year SEDA decide. Based on paper, ROI will be around 5 to 7 years depending on weather and locations.

Declare annual availability in MWh: This is a table declared by SEDA, and each rate is different based on locations. Eg, rate in Penang may be different compare to in KL. Maybe it based on weather statistic of past years to compute.

Things to take note:


  • I was inform that I have to pay my electric bills promptly every month, because if I don't it will effects TNB from paying me the feed-in. 
  • TNB will not contra off the electric bill that we consume. We still have to pay TNB bill monthly as usual. And they will bank in the feed-in money into our account.
  • After installation, the whole system is part of the property and is not removable or shift to new building. However, if decided to sell the property... the whole system will sell together to the new owner. And the income from TNB feed-in will goes to the new owner as well. And the contract remaining period still active with the new owner until the year 21.  


I find GreenSolar has done a great job overall. Although some of their answers are hard to convince my questions, but anyway they have done their very best to fulfill my curiosity and complete the work in the shortest time.

I have the inverter manual and I could read it my own to get more detail. I find there is RS485 connection on the inverter, which I can hook it up to a PC to get detail data logging from it. This will be my next DIY project to squeeze more data from the inverter. Stay tune!


Original wall before installation
Solar panel

Behind solar panel where its circuit is installed


Each panel generate 30vdc


Install inverter bracket


Switch box beside inverter where the wires from solar panel goes into


Install wires that connects into the Grid


The grounding pole approx 1 metre goes into the ground


Brackets that mount solar panel onto the roof


Wiring from the solar panel


Wiring completed


TNB guy come and install feed-in meter after 2 months of complete installation.


Cover up and seal