Sunday, December 30, 2018

Bypass WhatsApp Video File Limit

As if you landed here means you are experiencing Whatsapp force you to trim the video you were trying to attached in your chat due to your video file size has exceed 16mb limit.


Just wonder why we could receiving videos which is larger than 16mb from friends or Whatsapp chat group but could not send. There are various tweak available if you google, such as root your android phone to bypass whatsapp from checking the video file size, compress video files or edit the video. But these method is too troublesome.

The good news is there is another not too troublesome method. Use Whatsapp desktop app or web-app to send the video.

Below is the method I normally use...

1. Use SendAnywhere mobile app to send the video file to your PC/Mac.
2. Go to send anywhere website from PC/Mac and download the file being send from your phone.
2. Then attach the video to the chat/group with Whatsapp PC/Mac desktop app or web Whatsapp.

With this method, Whatsapp limit is 64mb. If your video is larger than 64mb... well, I currently do not have a simple solution.

Link to SendAnywhere App
How to use SendAnywhere video tutorial

Friday, July 6, 2018

Logitech wireless mouse/keyboard USB receiver software

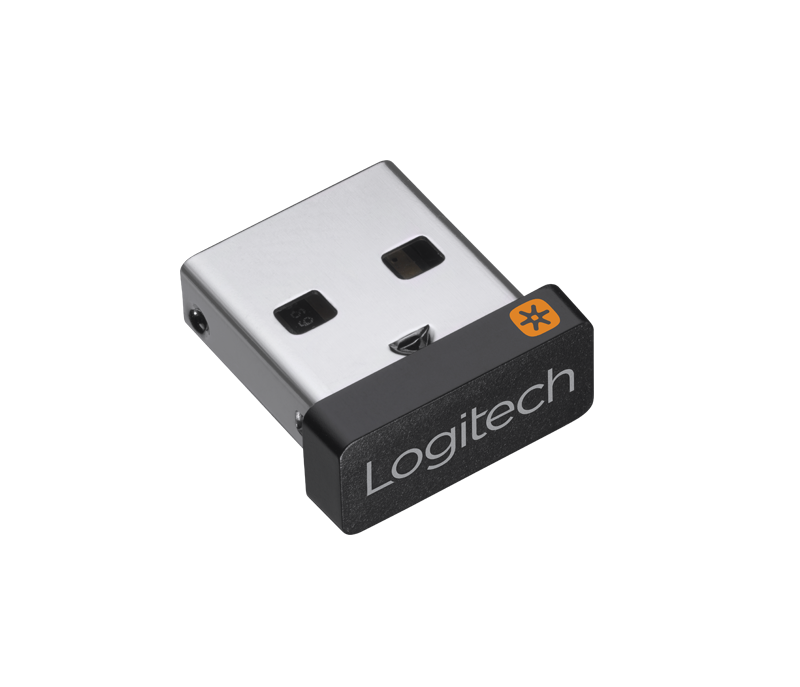
Logitech produce quite a lot of stuff, but their popular devices are still wireless keyboard and mouse. There is a particular product very useful is their unifying USB receiver. It is sold separately and what it does is, it could pair up to 6 devices. Really... do I need to pair that many mouse and keyboard with my PC?
An real application example is, when you have a set of keyboard and mouse at home, and another set in office, and another set at your mistress home so you can pair them up into this single USB unifying receiver. It actually benefits notebooks more than a desktop.

Another application is when you have lost or a faulty USB receiver that comes with your keyboard/mouse, instead of throwing away the keyboard or mouse away you can buy this unifying receiver to replace the faulty receiver.

Check if you have a unifying compatibles devices 


You need to have a device with the unifying logo printed on its label to be able to use the USB unifying receiver. Check it before buying!

Softwares to configure you mouse/keyboard.

** Reminder, if you pair your device to this new USB unifying receiver, the original receivers will no longer works. But don't worry, there is a way to restore it back to the original USB receiver.

To configure you USB unifying receiver, you need this software to do it...

For Windows machine
For Mac OS...

Or if you prefers to download from official download site Here.


Software to restore your wireless mouse/keyboard back to original USB receiver.

Why we need this software? As I mention earlier, after your mouse/keyboard has been pair to Unifying USB receiver, it will no longer work with its USB receiver that comes with it. Luckily Logitech has include another software to restore its original USB receivers.

Only windows available... download here. ConnectUtility_2.xx_Logitech.exe.

Or if you prefers to download from official download site Here.

Tuesday, February 27, 2018

Allen Bradley XM series


This XM120 module already obsolete and should be replace by XM-124. Below is the steps to get this part replace.


If using this module, it should be dock with XM-940 Dynamic Measurement Module Terminal Base - A DIN rail mounted base unit that provides terminations for all field wiring required by XM Dynamic Measurement and Eccentricity modules.

User guide: http://literature.rockwellautomation.com/idc/groups/literature/documents/um/gmsi10-um010_-en-p.pdf

Sunday, February 11, 2018

MacOS Sierra Hidden Login Item Or Autorun during startup

Other than manually add auto startup app in user & group preference, there is another path some apps or adware like your mac to run it after startup. Do remove it and it should be good.

/Users/userfolder/Library/LaunchAgents

You can get into this folder in finder > go pull menu, then hold option key on your keyboard and Library should be display.

Navigate into the path above, then a list of Plist file should be shown. Open the suspicious plist file and you should be able to spot something unusual app. After open the file with a text editor, find the path of the actual app.

Always google the app and check for more info. After identify its useless then we can proceed with removal.

1. Launch activity monitor app and end the app task.
2. Move the app to trash based on the path. 
3. Move the Plist file to trash.
4. Empty trash.

There it should be removed.

Saturday, March 28, 2015

Setting up Inverter motor

One thing good to buy stuff from China is cheap. Problems with China product is their support and documentation. I came across an Inverter which is cheap... I think, manual in full Chinese characters. And it only describe the settings, but not explaining how to use it or apply it.

However, I have figure out some of the basic settings that need to get it running. Below is the list you need to set at first before run the motor for the first time.

Lets start run the motor with pressing the button on the panel. By default, the inverter will turn the motor when you press "START/RUN" button on the panel. If the motor doesn't moves, then by turing the knob on the panel to increase the power... hence motor will move.

Button on the panel is fully manual operation. If you need to use the PLC to control it run and stop, you will need to wire the input bits on the inverter.

By default, most of the inverter setting
DI1 = FWD
DI2 = REV
DI3 = Multisettings bit 1
DI4 = Multisettings bit 2

These DIn function can be configure to take other function. Check the manual, it should have lists of option to choose from.

2ndly, we are interested in Accel and Deceleration. Inverter use "seconds" from 0 to desire speed.
Check your manual, it should have an option to set the Accel and Deceleration.

3rdly, How we want the inverter to accept run/stop command. There are a few options: Panel button; IOs; or Communication port (normally RS485).

4th, How you want the motor to stops. It has 2 options: Free the motor, or reduce to stop by inverter.


Once the settings are set, motor will run the same behavior when turn on DI1 or DI2.

If you need different speed settings, then you have to utilize DI3 and DI4.

Check the manual for multisettings combination bit settings. Example here is DI3 and DI4. Because the inverter i am using only has 4 DI. First 1 and 2 has been used for direction, so left only 2 bits DI. With this 2 bits DI, you can configure 4 different settings with the combination binary method.

Above few settings should be sufficient for normal forward reverse operations. In fact, it has more capable than this. I leave you some room to explore it yourself, or you could share your adventure with me in my comment box.