I did some research in term of speed, reliability, warranty, and price intention to upgrade my getting slower and slower i7 MacBook Pro mid 2012. I did quite some search on the net hoping to get my mavericks runs faster but end up upgrading the HDD to SSD is the best option I could have.
Cut this story short, I got my SSD somehow... the best deal is Samsung EVO 840. I got it delivered to my door. And I waste no time, put it to transfer all my stuff from the HDD (320GB worth of data) to my new SSD while sleeping at night. Next morning, just swap the SSD into the MBP SATA bay and it just works!

Product info: http://nl.transcend-info.com/Products/No-617
2) Philips #0 screwdriver
3) MacOS X Mavericks installer app (get it from app store).
4) Chameleon SSD optimizer (http://chameleon.alessandroboschini.it/index.php)
4) Connects the USB port of the enclosure and the Mac USB port
5) It should prompt you to format, or if it doesn't then launch Disk Utility and format the drive with Mac OS Extended (Journaled).
7) Run Mavericks installer and choose install destination to the SSD drive (yes while still hooked on the USB port)

9) You will then ask you to do setup as new. Just simply SKIP whatever you can here because we are going to migrate whatever apps, doc, system settings from the HDD. Setup as new and reinstall apps, reconfigure mailbox, calendar, contacts is a waste of time and precious internet bandwidth.
10) After got into the finder, launch Migration Assistant app in Application folder\utilities\ folder.

Cut this story short, I got my SSD somehow... the best deal is Samsung EVO 840. I got it delivered to my door. And I waste no time, put it to transfer all my stuff from the HDD (320GB worth of data) to my new SSD while sleeping at night. Next morning, just swap the SSD into the MBP SATA bay and it just works!
Tools you need:
1) USB 2.0 or 3.0 HDD enclosure. After did some review search, I bought this one. Not very cheapskate looks although its cheapskate a bit.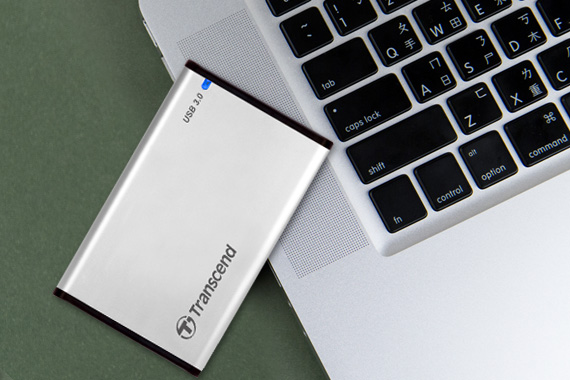
Product info: http://nl.transcend-info.com/Products/No-617
2) Philips #0 screwdriver
3) MacOS X Mavericks installer app (get it from app store).
4) Chameleon SSD optimizer (http://chameleon.alessandroboschini.it/index.php)
Procedure:
1) Download MacOS X installer if you do not have it ready. Just run App Store and you can download it free.
While downloading,
2) Open up the enclosure
3) Connects the SSD onto the SATA connector of the enclosure PCB board
4) Connects the USB port of the enclosure and the Mac USB port
5) It should prompt you to format, or if it doesn't then launch Disk Utility and format the drive with Mac OS Extended (Journaled).
After the MacOS finished download, it should be at Application folder.
6) Head to Application folder and copy the installer app elsewhere out from Application folder...
7) Run Mavericks installer and choose install destination to the SSD drive (yes while still hooked on the USB port)
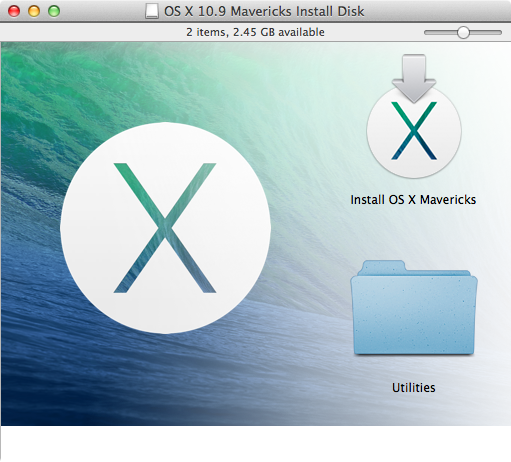
8) Follow on screen instructions on the installations until it reboots from the SSD (yes still on USB)
9) You will then ask you to do setup as new. Just simply SKIP whatever you can here because we are going to migrate whatever apps, doc, system settings from the HDD. Setup as new and reinstall apps, reconfigure mailbox, calendar, contacts is a waste of time and precious internet bandwidth.
10) After got into the finder, launch Migration Assistant app in Application folder\utilities\ folder.
11) Choose transfer data from OLD Drive. Pretty much easy to understand what the app will do. Just leave it for a night, and it will be goes to sleep after everything is transferred.
12) When wake up in the morning, shut down the MBP. Flip it over and loosen the screws that hold the cover. And its pretty much straight forward how to get it replace. Google youtube you will get tons of it.
13) Then continue to use the Mac as usual. The only difference is the responds and speed are so much faster, and its fun to use!
14) Now point to http://chameleon.alessandroboschini.it/index.php to download Chameleon SSD optimizer. MacOS X does not automatically set 3rd party SSD to trim enable. Hence, without it... SSD wear and tear sooner. Run this app to turn on TRIM. Remember, whenever you run upgrade on the OS, the TRIM will be disabled. So run this app again to enable it back. It will stay until you update OS again. Please do donation to the programmer. They spend their time to work on the program and UI to ease ordinary people like us to make configuration. Without this app, we actually can activates the same thing via terminal command. Which requires a lot more google to achieve it.
If you are curious of my settings... here is my preference:
TRIM: Enable
SUDDEN MOTION SENSOR : Off
NOATIME : On
SET SLEEP MODE : A
DISABLE SLEEP IMAGE : Off
12) When wake up in the morning, shut down the MBP. Flip it over and loosen the screws that hold the cover. And its pretty much straight forward how to get it replace. Google youtube you will get tons of it.
13) Then continue to use the Mac as usual. The only difference is the responds and speed are so much faster, and its fun to use!
14) Now point to http://chameleon.alessandroboschini.it/index.php to download Chameleon SSD optimizer. MacOS X does not automatically set 3rd party SSD to trim enable. Hence, without it... SSD wear and tear sooner. Run this app to turn on TRIM. Remember, whenever you run upgrade on the OS, the TRIM will be disabled. So run this app again to enable it back. It will stay until you update OS again. Please do donation to the programmer. They spend their time to work on the program and UI to ease ordinary people like us to make configuration. Without this app, we actually can activates the same thing via terminal command. Which requires a lot more google to achieve it.
If you are curious of my settings... here is my preference:
TRIM: Enable
SUDDEN MOTION SENSOR : Off
NOATIME : On
SET SLEEP MODE : A
DISABLE SLEEP IMAGE : Off